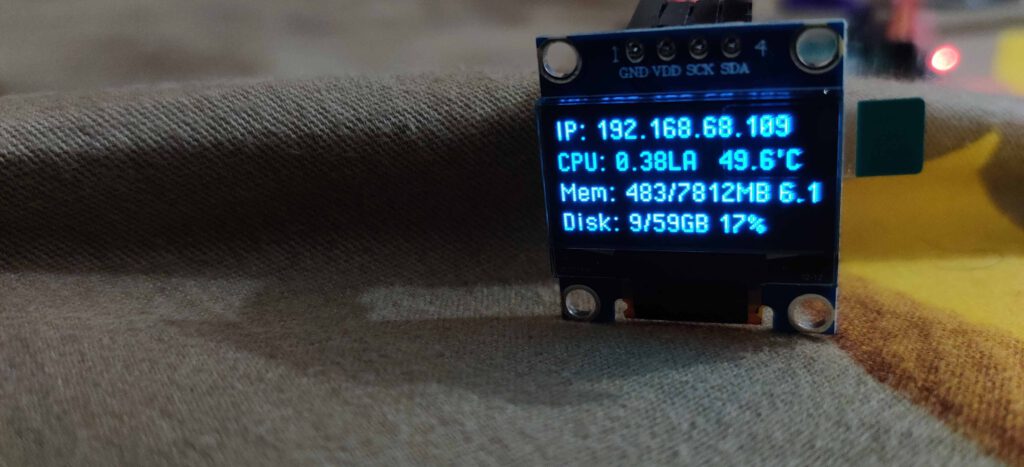
Raspberry Pi is a popular single-board computer that is widely used for prototyping and DIY projects. In this article, we will guide you through the process of how to set up an OLED display on Raspberry Pi with Ubuntu or Kali Linux. The OLED display will be used to display system statistics, such as IP Address, CPU temperature, RAM usage, and disk space.
Before we begin, make sure you have the following:
- A Raspberry Pi 4
- I2C OLED Display
- 4 Wire Female to Female Jumper Cable
- A Raspberry Pi Power Supply
- A keyboard and mouse (optional)
- An HDMI cable and a monitor (optional)
Step 1: Update the System Before Set Up an OLED Display on Raspberry Pi with Ubuntu or Kali Linux
The first step is to update your Raspberry Pi’s operating system. Open the terminal and enter the following command:
sudo apt update && sudo apt upgrade -y
This will update the package list and install any available updates. Depending on your internet connection speed, this may take a few minutes.
Step 2: Install Drivers and Libraries to Setup OLED Display on Raspberry Pi
Next, install the necessary drivers and libraries for the OLED display. Enter the following command:
sudo apt install -y python3-pip python3-dev python3-pil python3-setuptools python3-rpi.gpio i2c-tools
Step 3: Add Your User Account to the I2C Group on Ubuntu or Kali Linux
In order to access the I2C bus, you need to add your user account to the I2C group. Enter the following command:
sudo usermod -aG i2c kali
Replace “kali” with your username.
Step 4: Connect the OLED Display to the Raspberry Pi GPIO Pins
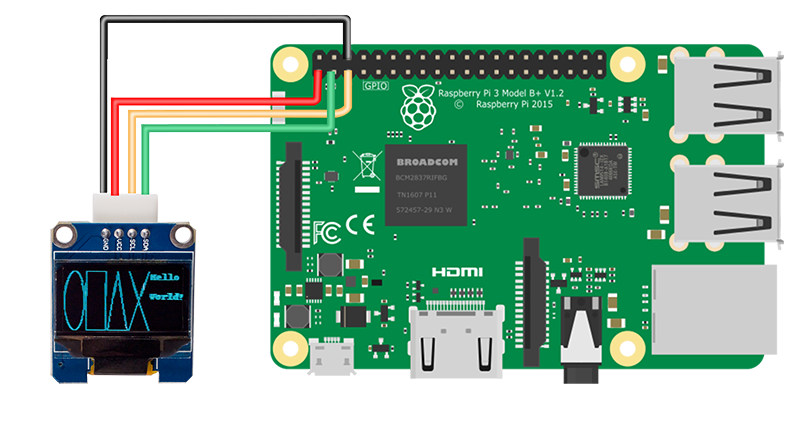
Connect the OLED display to the Raspberry Pi using a 4-pin header. We will connect the pins as follows:

- GND to any ground pin on the Pi
- VCC to 3.3V power pin on the Pi
- SCL to GPIO3 (pin 5) on the Pi
- SDA to GPIO2 (pin 3) on the Pi
Step 5: Check if the OLED Display was Recognized by Your Raspberry Pi
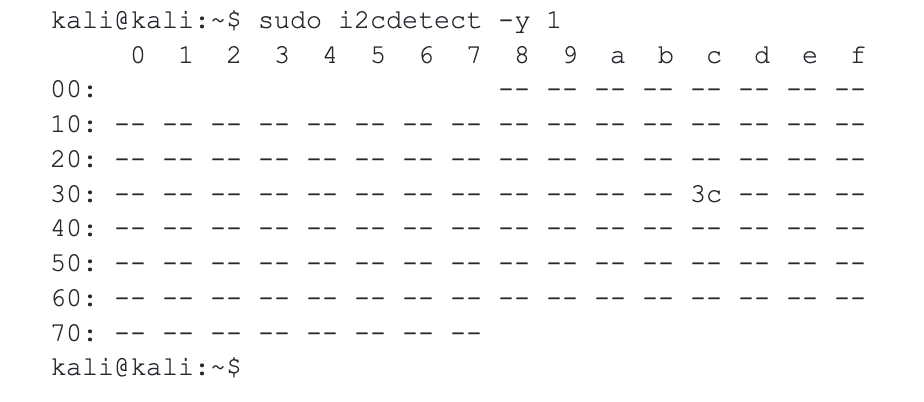
Now we will check if the display was recognized using the following command:
sudo i2cdetect -y 1
The output should look like the following:

Step 6: Install the SSD1306 Python Library for OLED Display on Raspberry Pi
Install the SSD1306 Python library by entering the following command:
sudo pip3 install adafruit-circuitpython-ssd1306
This library is required to communicate with the OLED display.
Step 7: Download the Monitor Script for Raspberry Pi Running Ubuntu or Kali Linux
Clone the monitor script from Michael Klements’ GitHub repository by entering the following command:
git clone https://github.com/tohfaakib/OLED_Stats.git
This will create a new directory called “OLED_Stats” containing the script.
Step 8: Run the Monitor Script on Your Raspberry Pi with Ubuntu or Kali Linux
Navigate to the “OLED_Stats” directory and run the script by entering the following command:
cd OLED_Stats
python3 stats.py
This will display system statistics on the OLED display. You can customize the script to display other things.
Conclusion
Setting up an OLED display on Raspberry Pi with Ubuntu or Kali Linux is a rewarding project that can enhance your Raspberry Pi’s functionality by displaying useful system stats like CPU temperature, RAM usage, and more. By following this guide, you’ve learned how to connect and configure your OLED display step by step, making it easier to monitor your system in real-time. Whether you’re using Ubuntu or Kali Linux, this setup allows you to make the most out of your Raspberry Pi for DIY projects and prototyping. Continue experimenting to display other information on your OLED screen, and enjoy the versatility this setup brings!

